How to set up a Facebook Store
With over 2 billion monthly users, Facebook is unquestionably the king of social networks. And with this many users, Facebook has some serious ability to get advertisers’ products in front of billions. Currently, Facebook offers a good platform of opportunities for selling your products… but comes with all kinds of complications.
“We know that your business may be experiencing disruptions resulting from the global outbreak of COVID-19. We've heard that a little financial support can go a long way, so we're offering USD 100M in cash grants and ad credits to help during this challenging time.”... Continue Reading
What Is a Facebook Store?.
We all know that you can set up a Facebook page for your business — means, a dedicated page separate from your personal Facebook account which can be set up quickly and easily. Facebook provides an add-on platform where you can open a store on your Facebook page and start making sales from directly within the platform.
This means if a customer clicks through to your business profile, they don’t even have to go to your website or other third-party websites, removing some impediment to the buying cycle/process.
Why Should You Sell on Facebook?.
Facebook grabs a lot of attention, with people spending on average 20 minutes every day on the platform, so it seems like a direct route that engaging with your Facebook community is a great way to grow your business. With nearly 1 million businesses already signed up, a Facebook business page can double your business acting as a virtual storefront for your business.
There is no fee to use their platform. You pay a 5% fee for every transaction above $8 and a fixed fee of $0.40 for orders below $8.
How to set up a Facebook store?.
Before we begin, you will need to make sure you have a Facebook account and a Facebook page for your e-commerce business. If you don’t have an account and page, go set one up now.
If you do, perfect... let’s get started; we are going to show you how to set up your Facebook store using the standard Facebook functions.
Step 1 – Go to Your Facebook Page and Add Store.
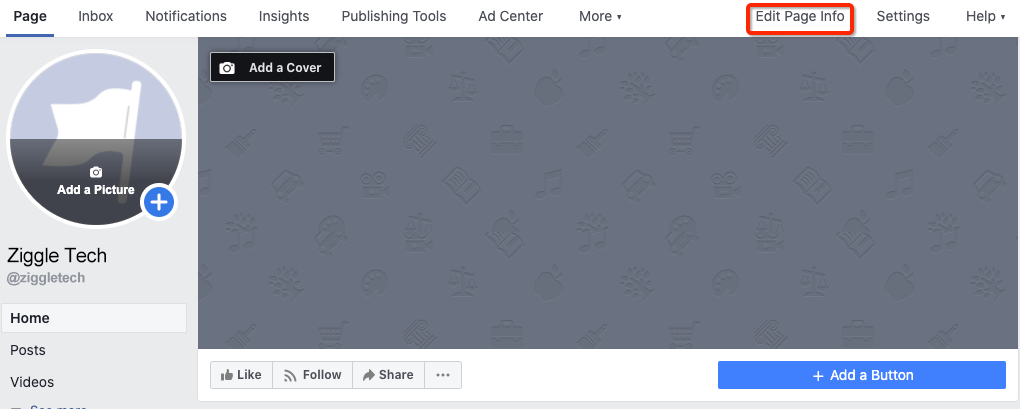
In order to add the store functionality to your Facebook page, you will need to add a store. Go to your business page and in the top right corner, click Edit Page Info.
Click on Templates and Tabs in the left-hand column.
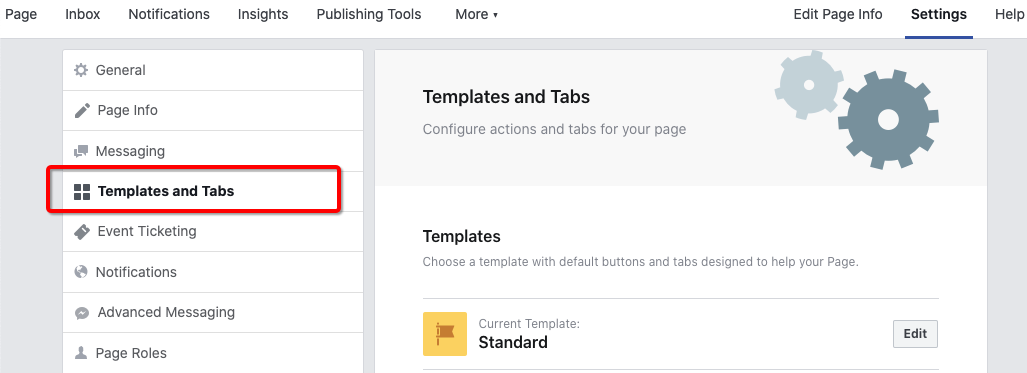
Find the Template section on the right-hand column and click the Edit button on the Current Template section, by default it is set to Standard.
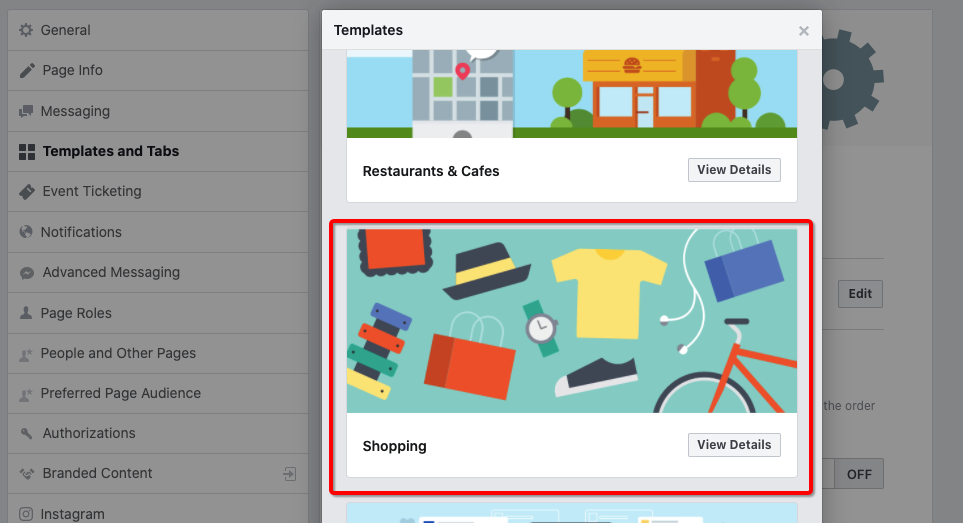
Find the Shopping template and click on the View Details button and click on Apply Template.
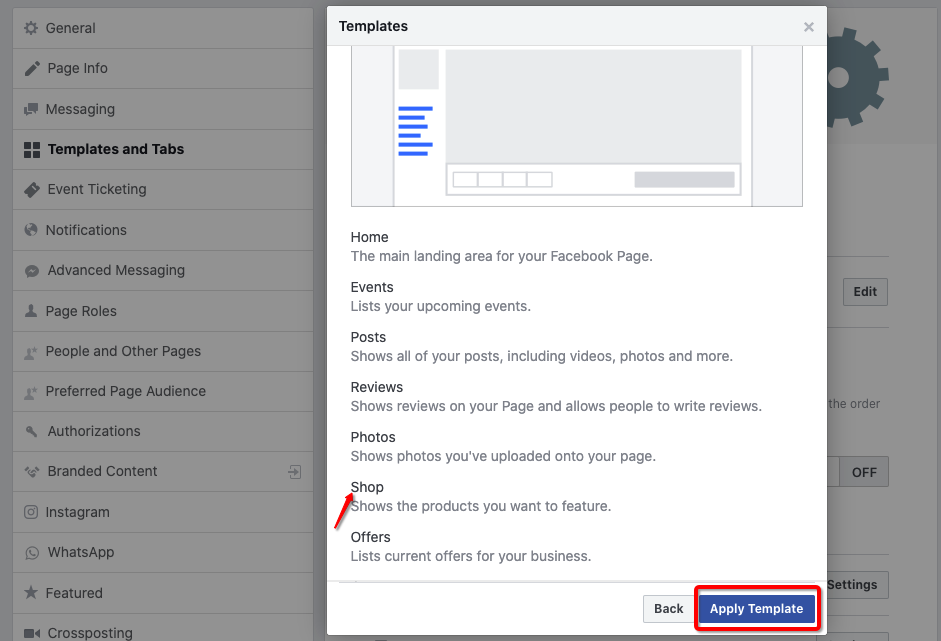
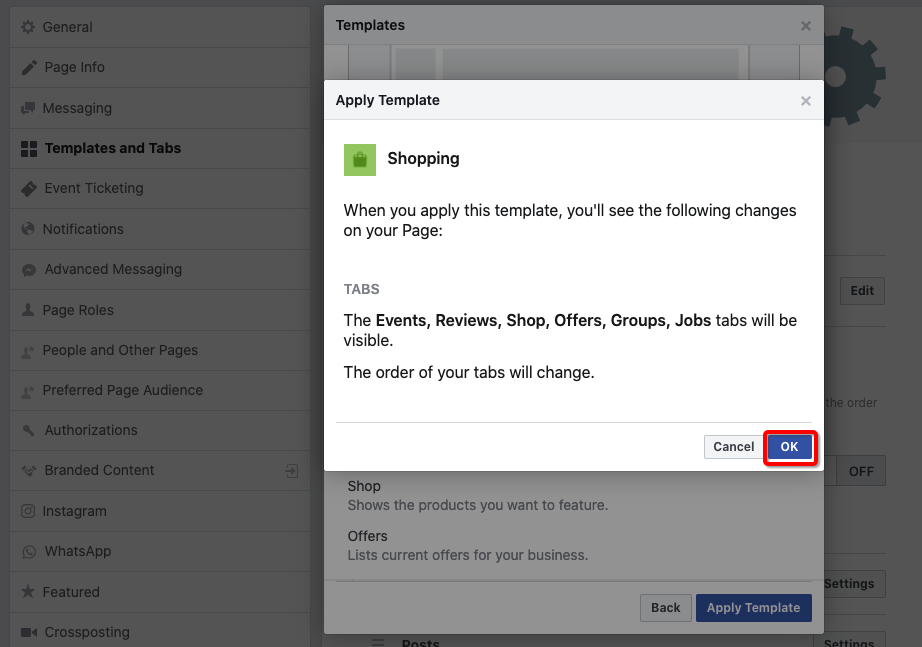
On clicking Applying Template it will show you the changes that will occur on your page. Click Ok to save.
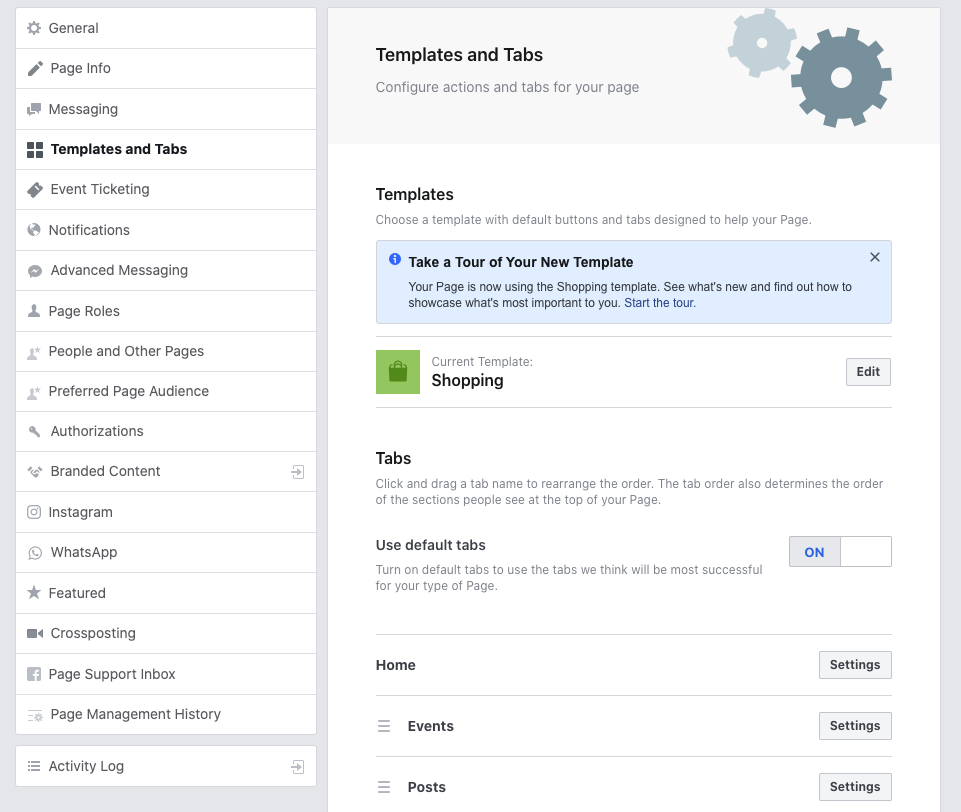
Now you will see that Current Template is changed to Shopping.
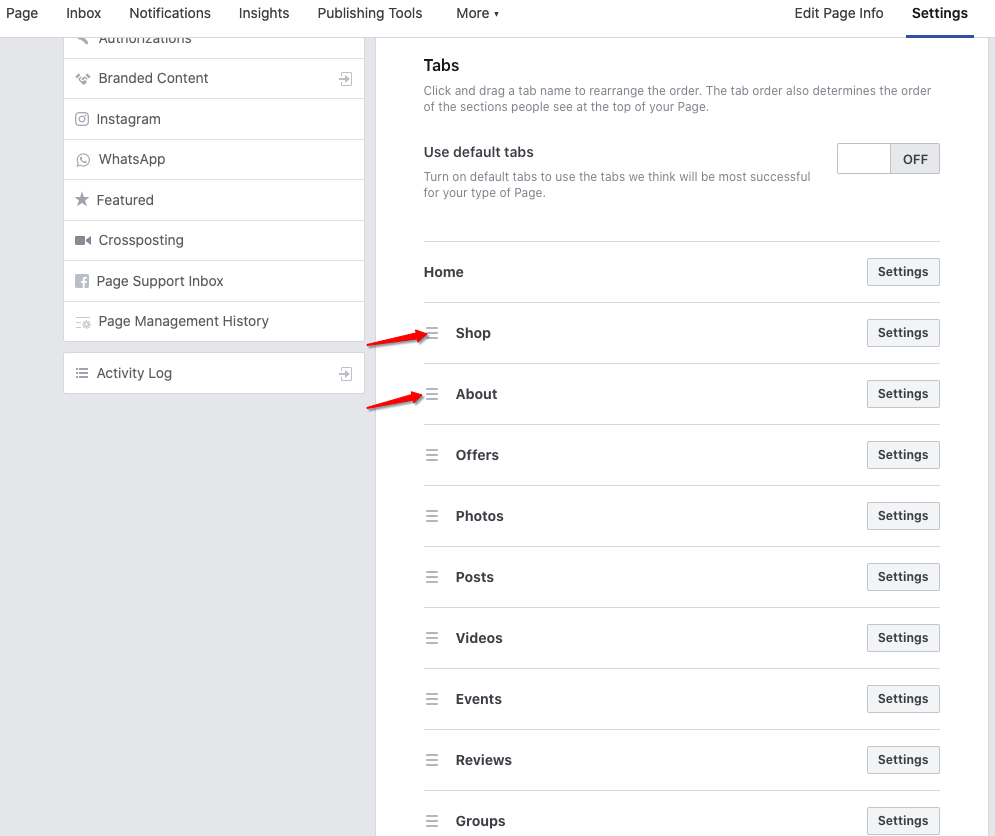
You will find that now a Shop tab is also enabled on the page.
Finally, go back to the Homepage of your business page you will find a new Shop tab.
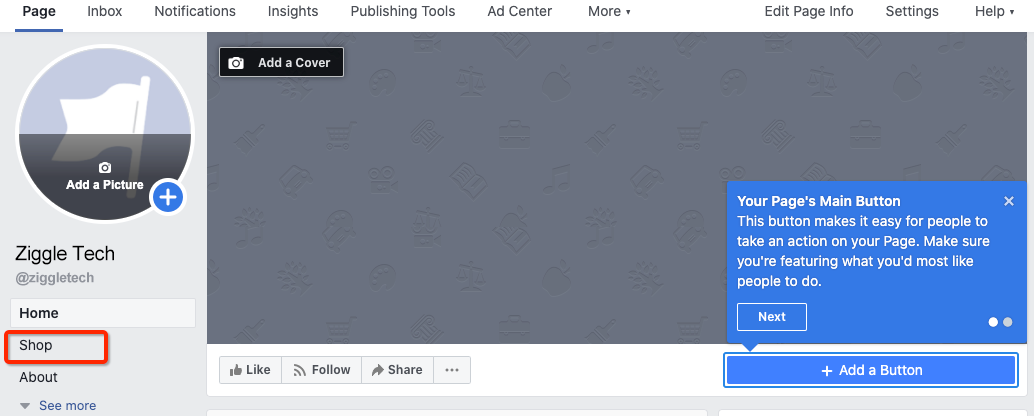
Click Shop to start the setup process.
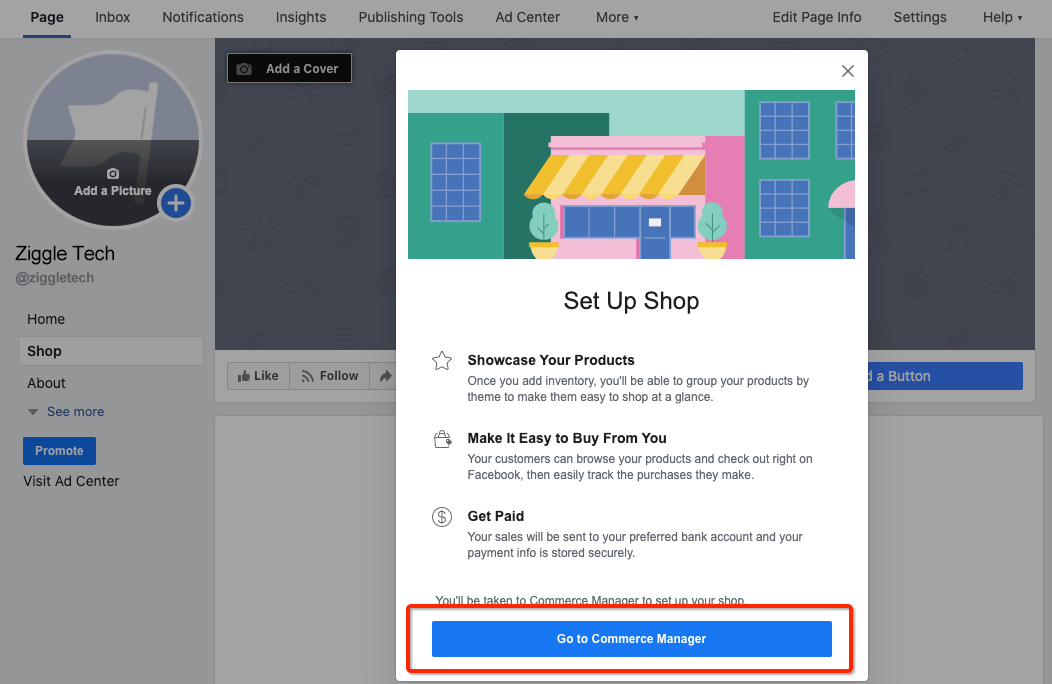
Step 2 – Setting up your Store with the Commerce Manager.
This step includes setting up of :
- Link Business Account.
- Set your Inventory and Preferences.
- Set up Payouts.
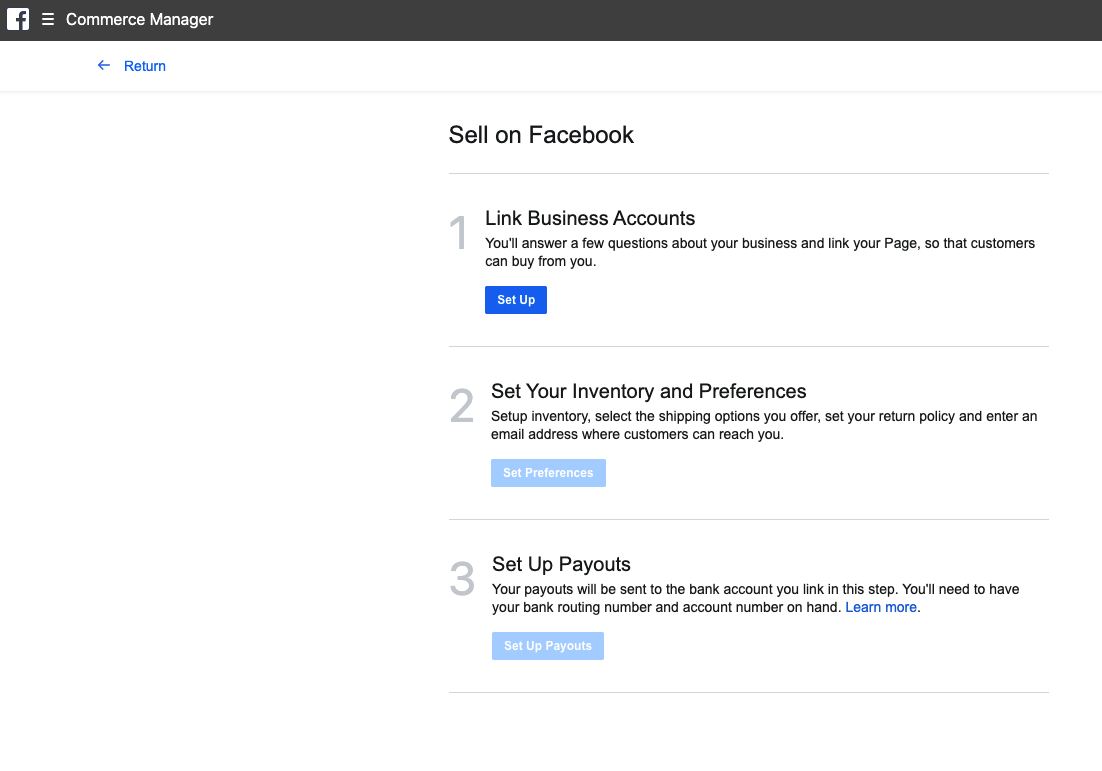
Linking Your Business Account.
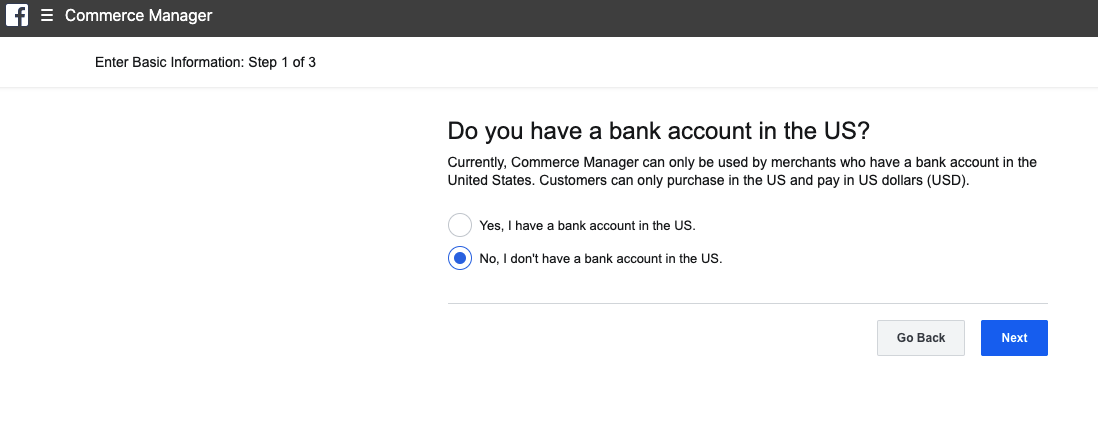
Step 1: Enter Basic information.
Here you will have to select whether you have a bank account in the US?. Currently, Commerce Manager can only be used by Merchants who have a bank account in the United States. Customers can only purchase in the US and pay in US dollars (USD).
Step 2: Link your Page.
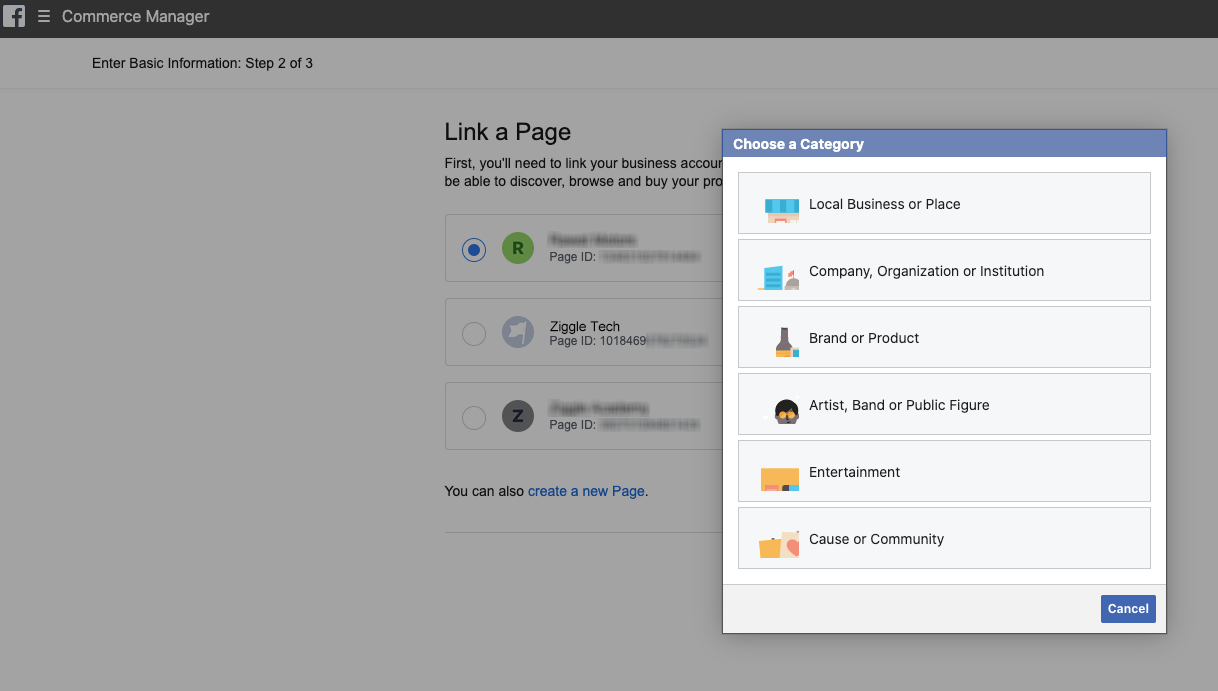
Here you will link your business account to your business Facebook page, if you have an existing business Facebook page then you can select it from the list and select the category for that business.
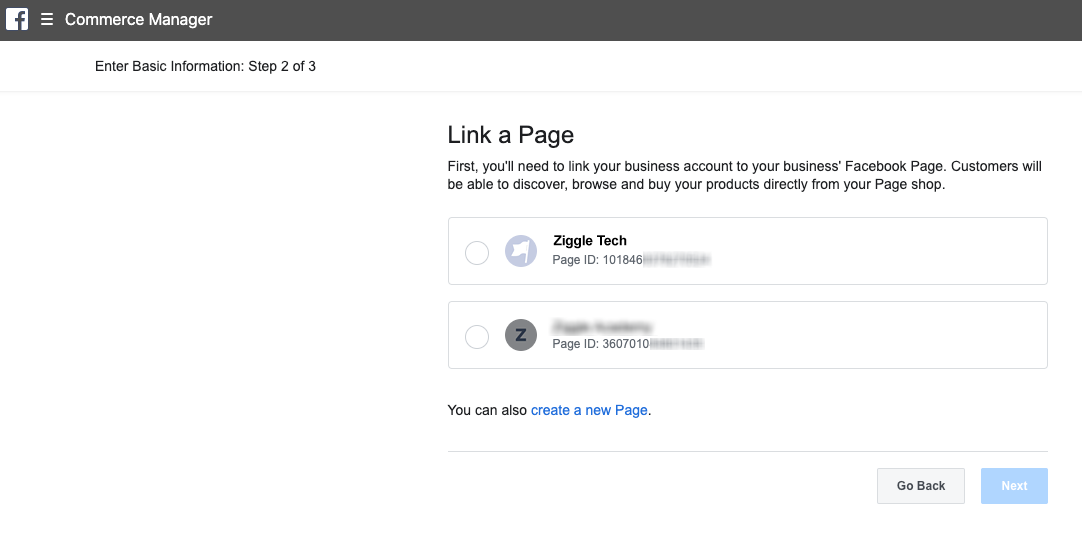
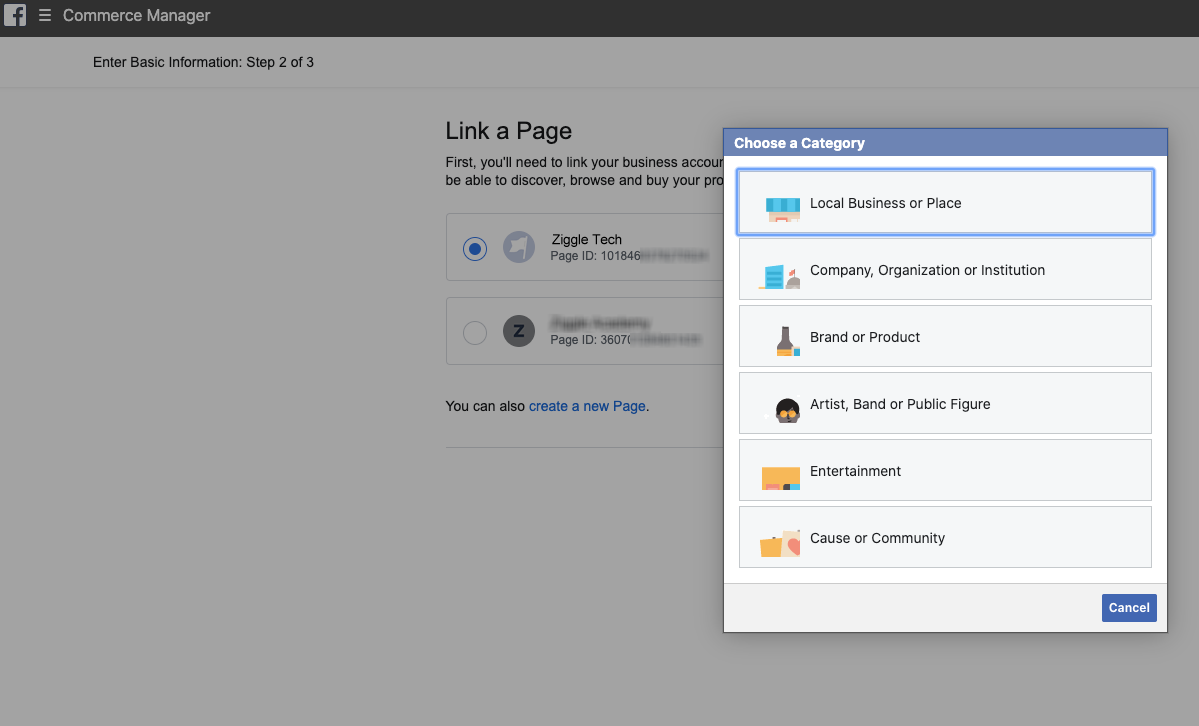
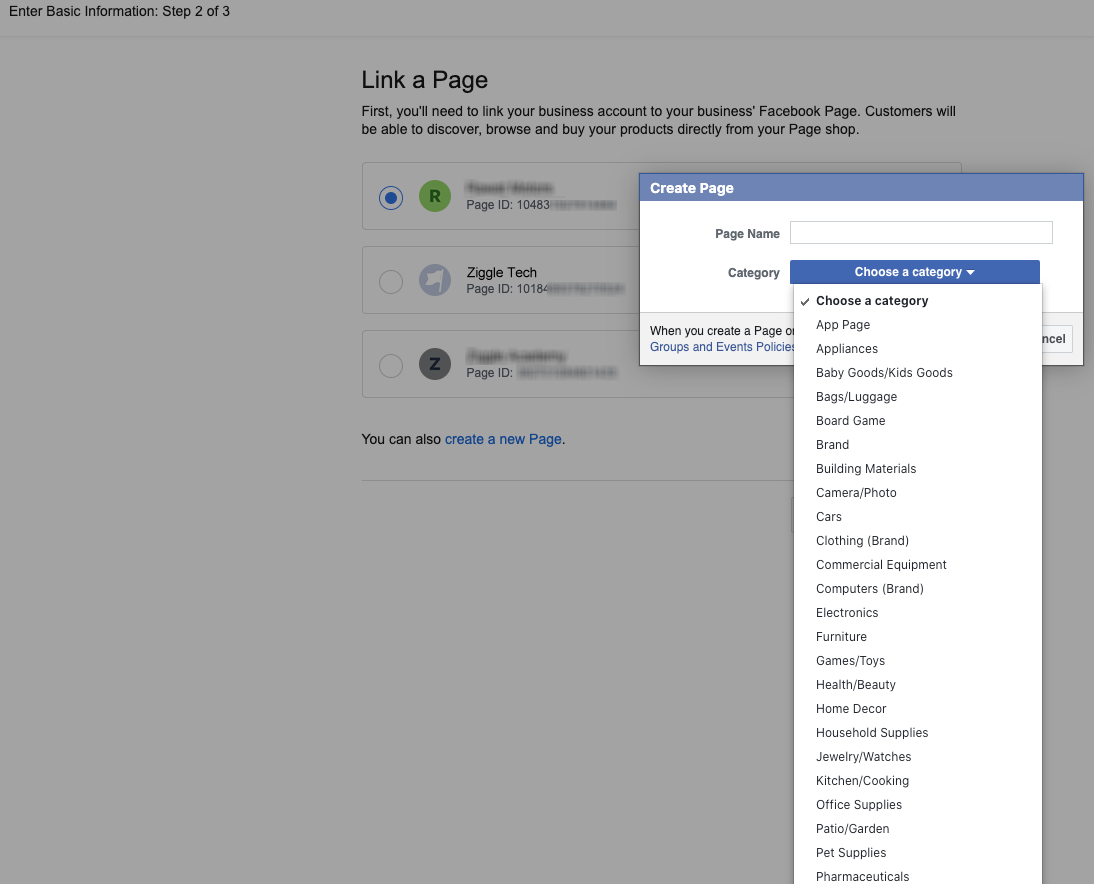
If you don’t have the page then you can create it there only on clicking create a new Page link and Choose a Category.
Next, you will have to give a Page Name and Category from the list.
Step 3: Link a Business.
In this step, you will link a business to your store, by giving your business a display name and link your business account from the list.
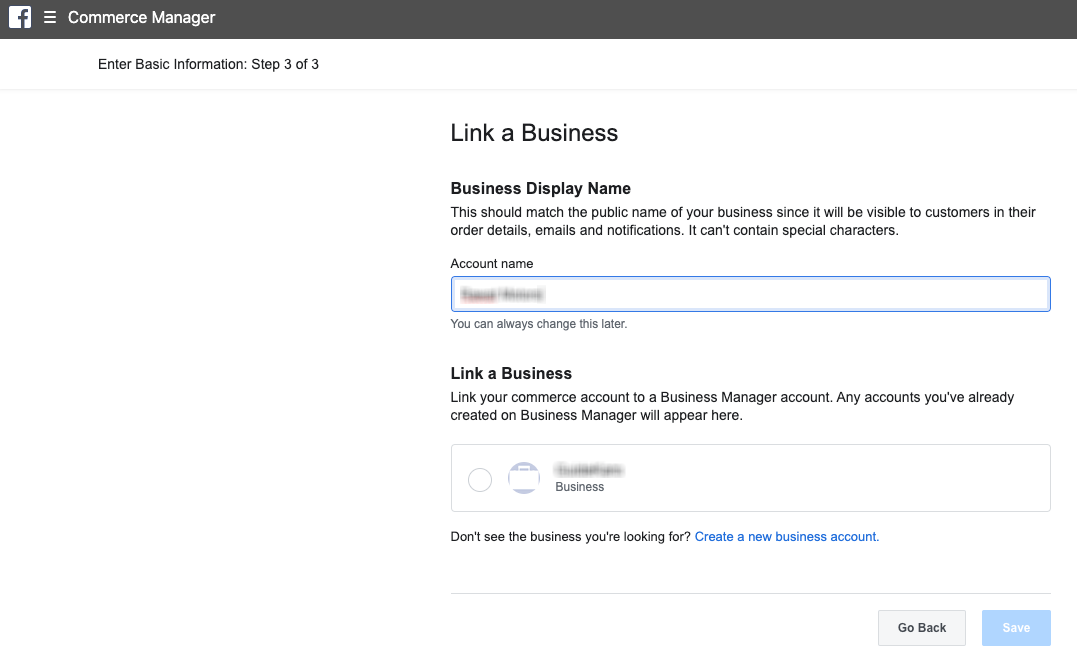
If you don’t have a business account you can create it from Create a new business account, and give it a Business Name and link your business account.
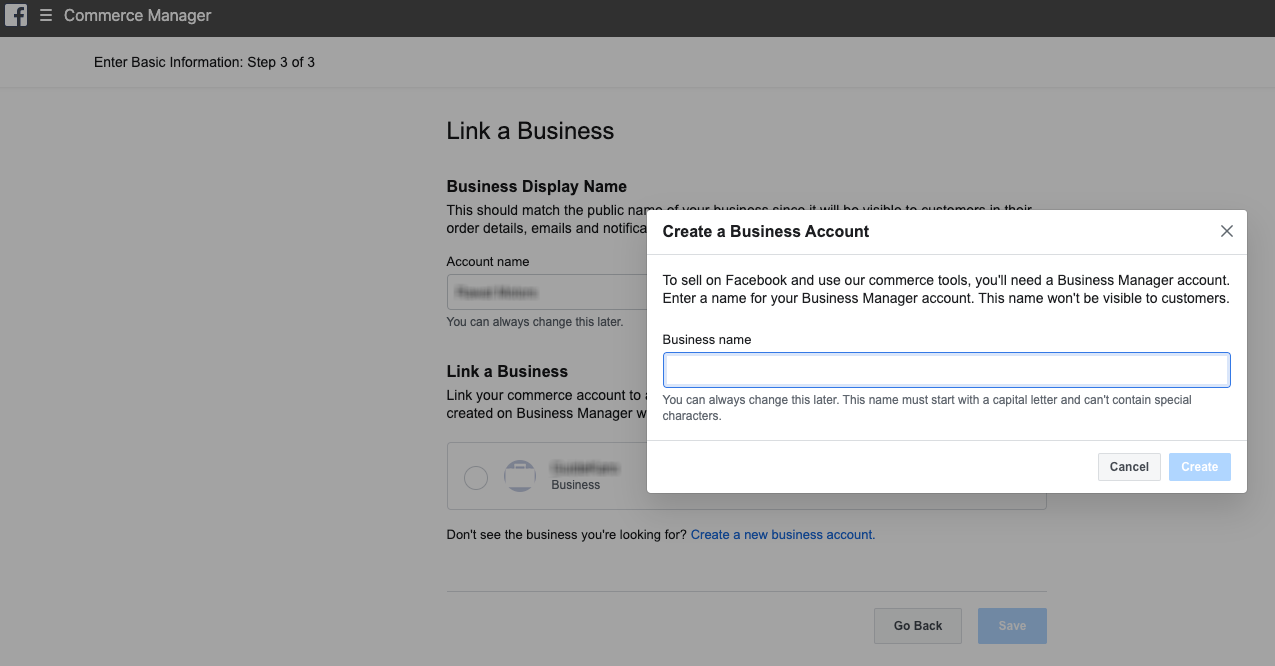
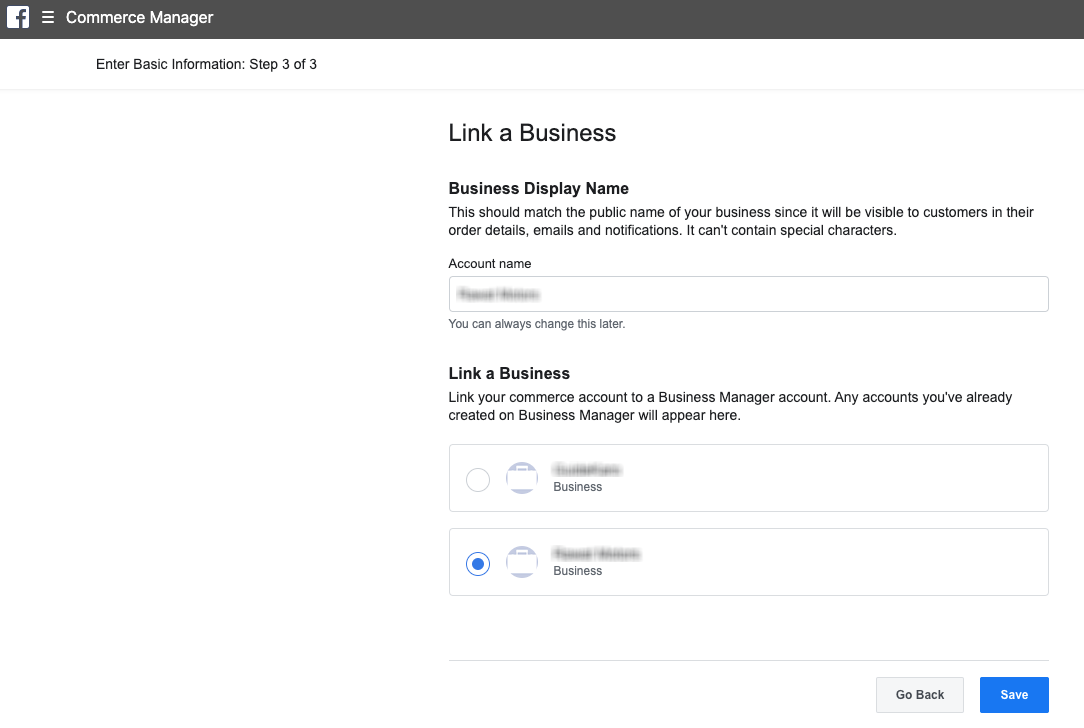
After completing the above step you will be able to see a Green badge on the Link Business Account section.
Set Your Inventory and Preferences.
This section let you set up your Store Inventory, Shipping Options, Return Policy, and Email Address to communicate with your customers
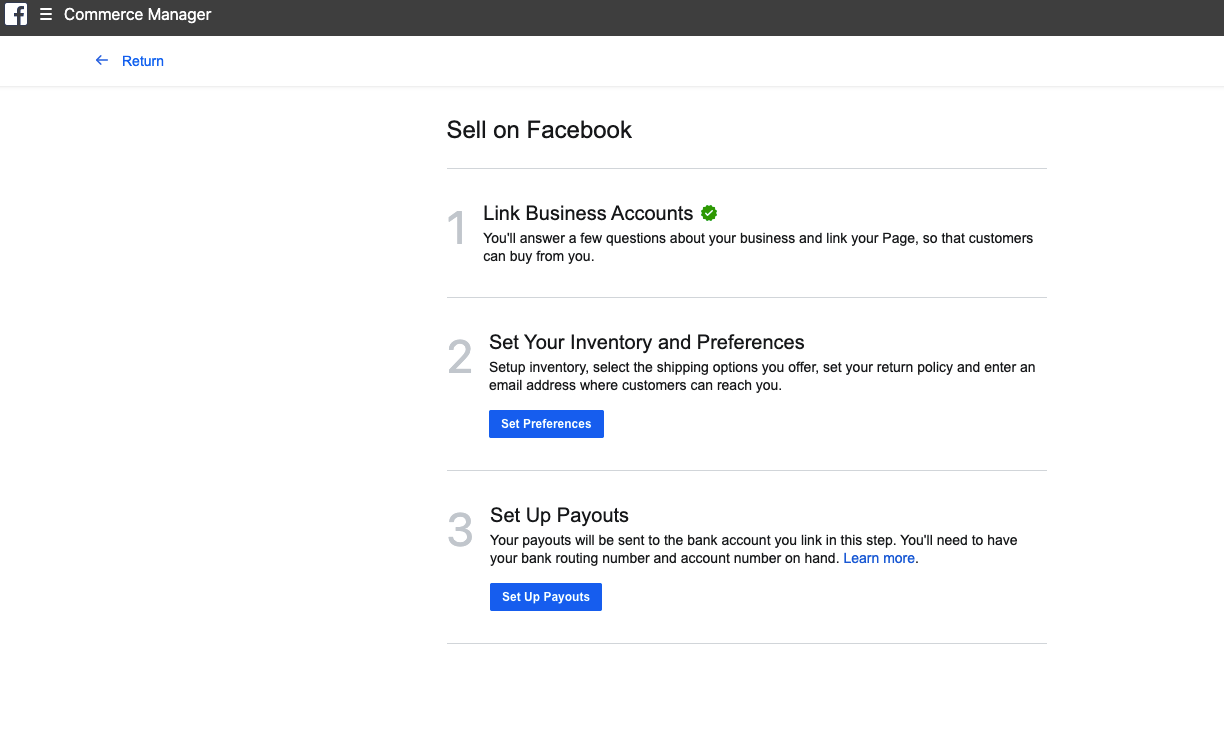
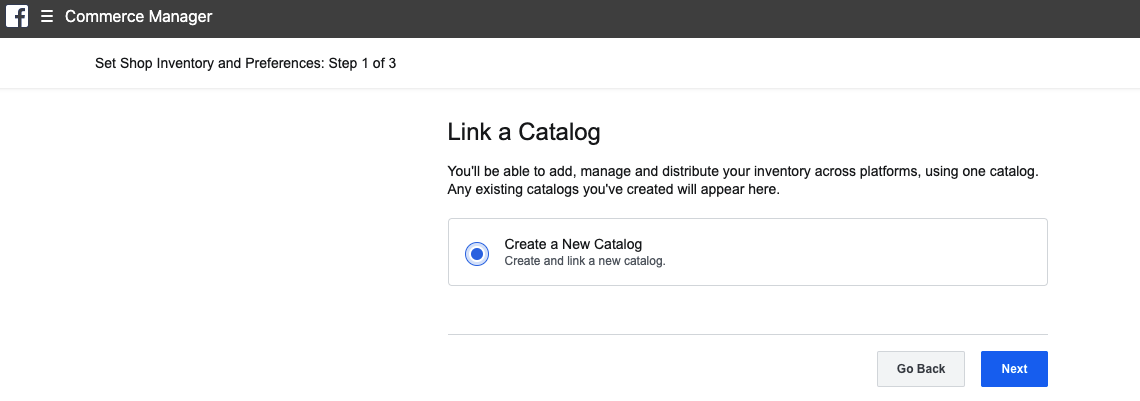
Step 1: Shop Inventory and Preferences.
Link a Catalog: Here you can add, manage, and distribute your inventory using a catalog if you already have an existing catalog it will appear here. Select the catalog and continue to the next step.
Step 2:
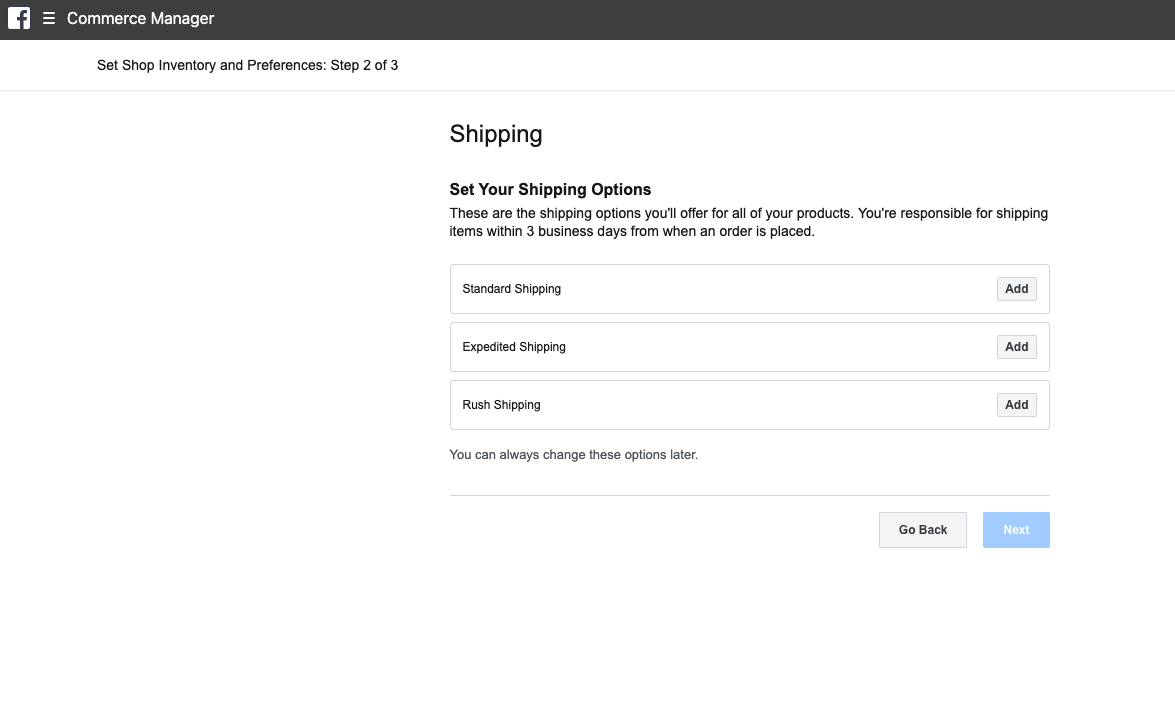
Shipping: Here you can set up your shipping option for all your products, you set options for Standard Shipping, Expedited Shipping and, Rush Shipping.
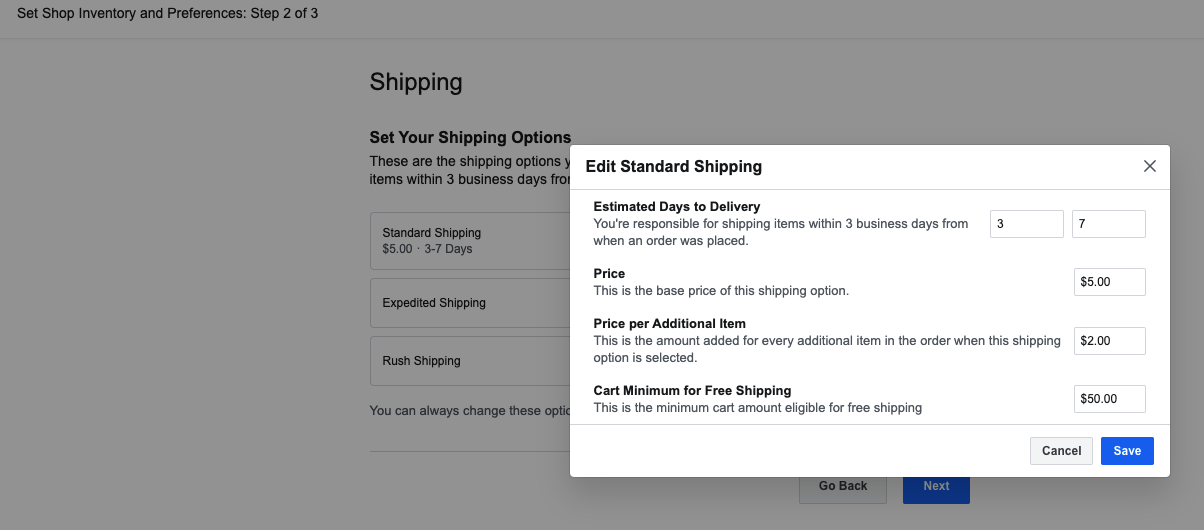
Setup Standard Shipping Option: Click on the Add button to set the standard shipping option for your store, you can set Estimated Days to Delivery, Price for shipping, Price per Additional Items and, Cart Minimum for Free shipping.
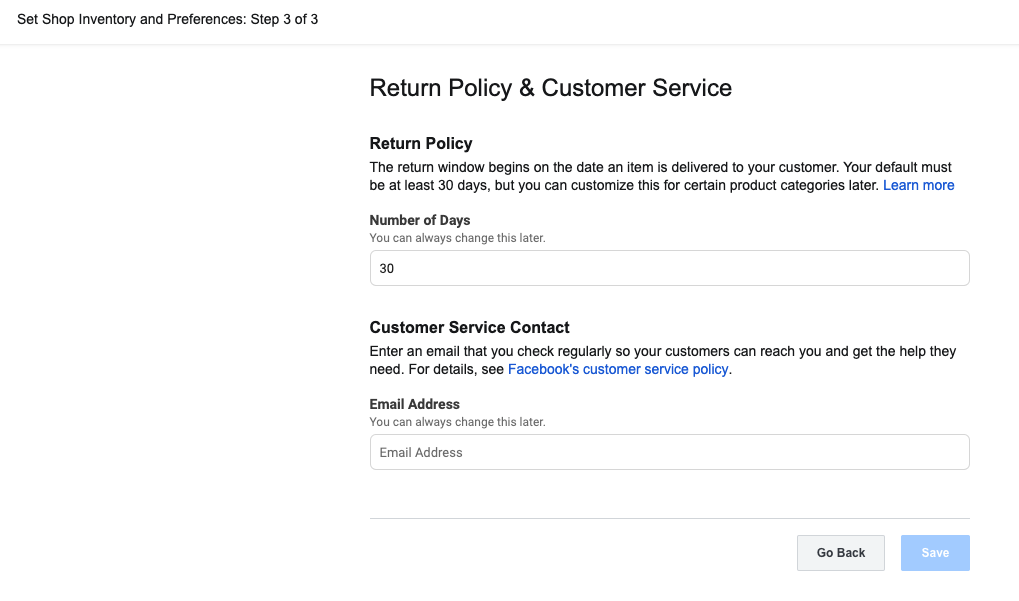
Step 3: Return Policy, Customer Service Email Address.
Set up your Number of Days for Return Policy by default it is set to 30 days, but you can edit it as per your requirement. Also, set up an email address for Customer Service Contact.
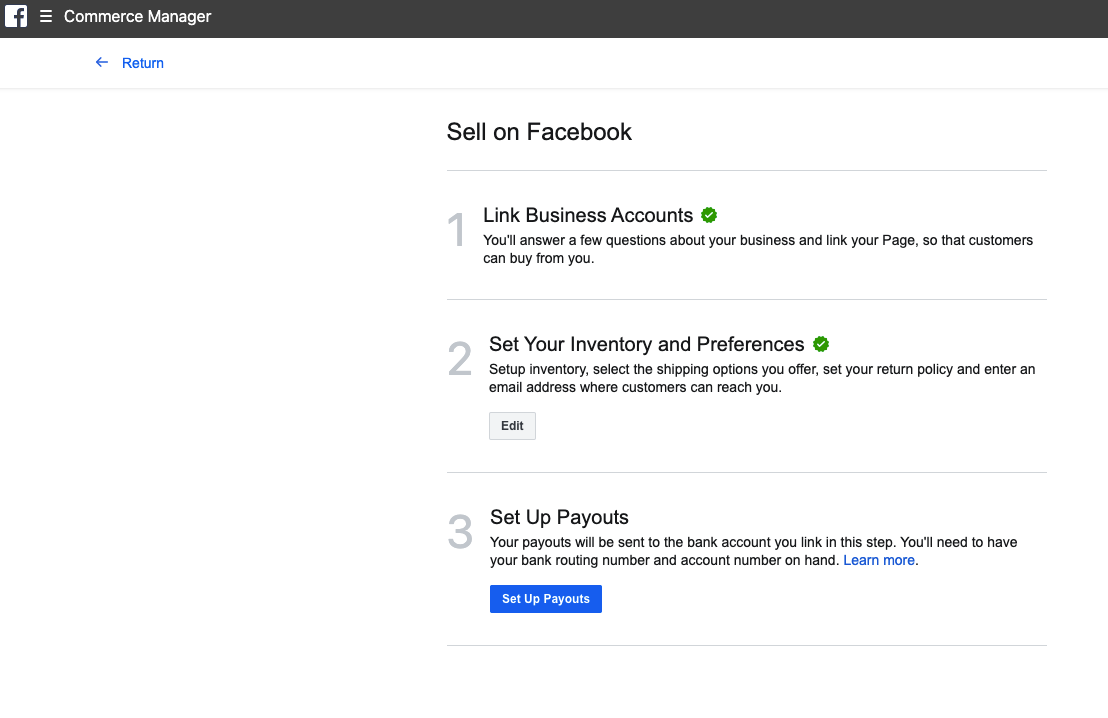
After completing the above step you will be able to see a Green badge on the Your Inventory and Preferences section.
Set up Payouts.
Here you can set up your Payouts, What you sell?, Where do you do Business?, your Tax Representation and, Linking you Bank Account.
Step 1: Set up Payouts.
Set up your Business Address associated with your bank account which you’ll use for payouts.
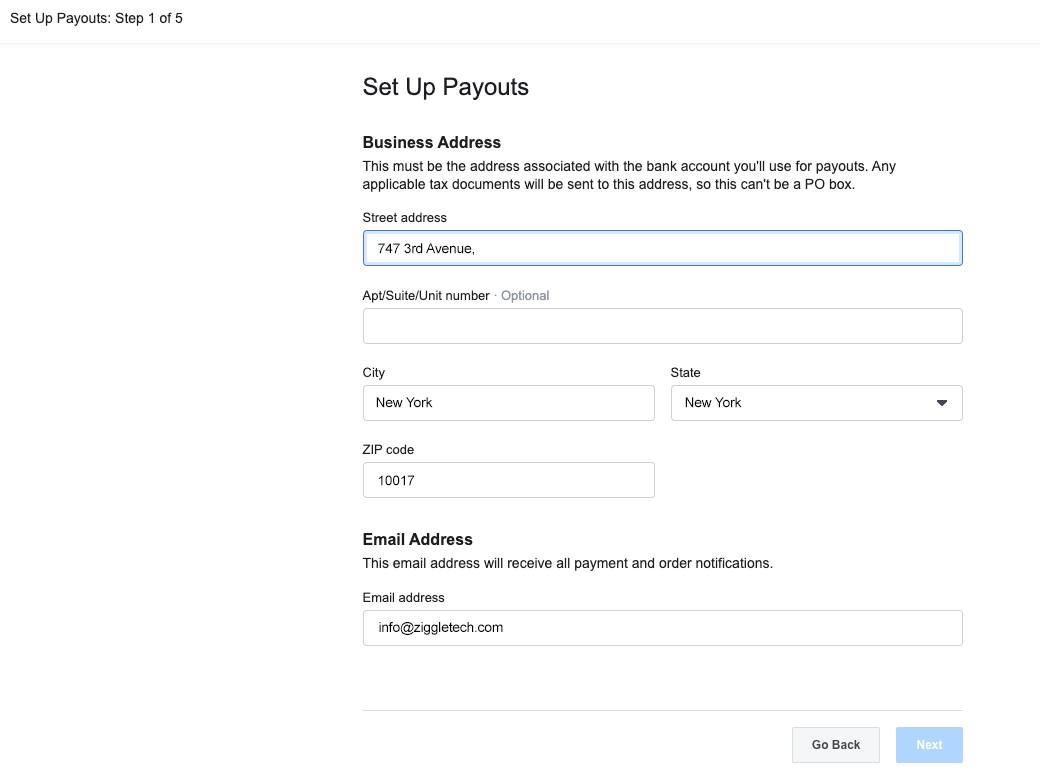
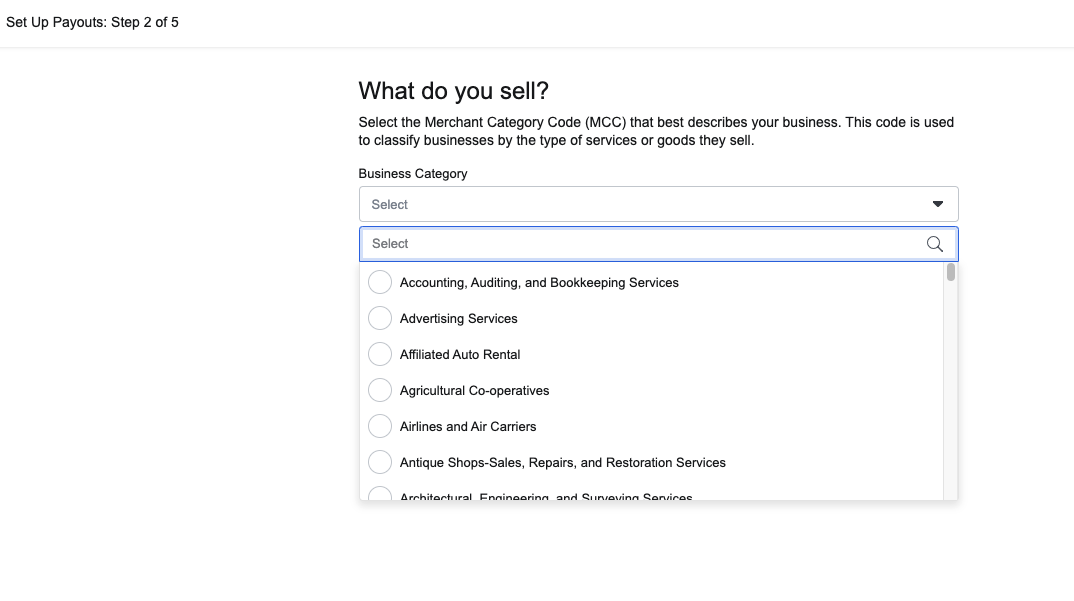
Step 2: What you sell?.
Select the Category that describes your business.
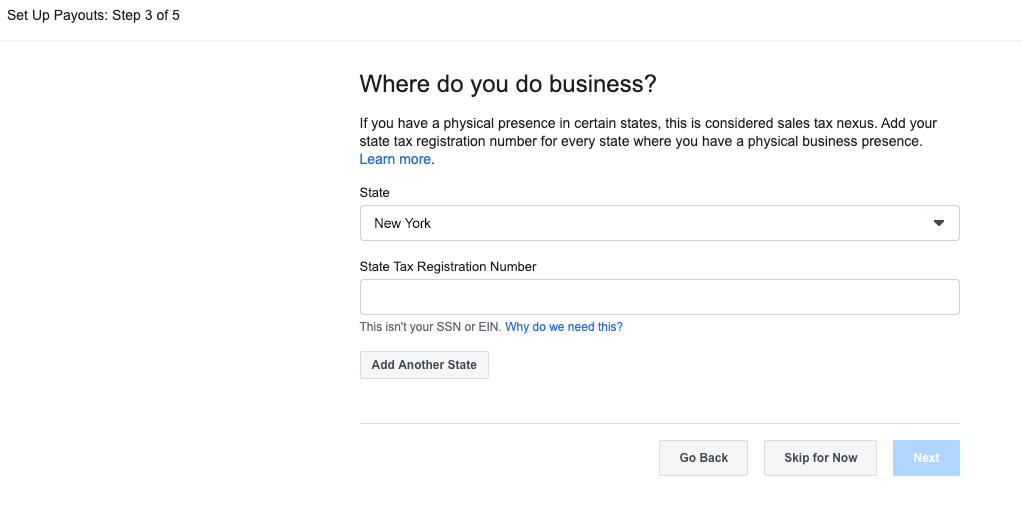
Step 3: Where do you do business?.
Add your state tax registration number for every state where you have a physical business presence.
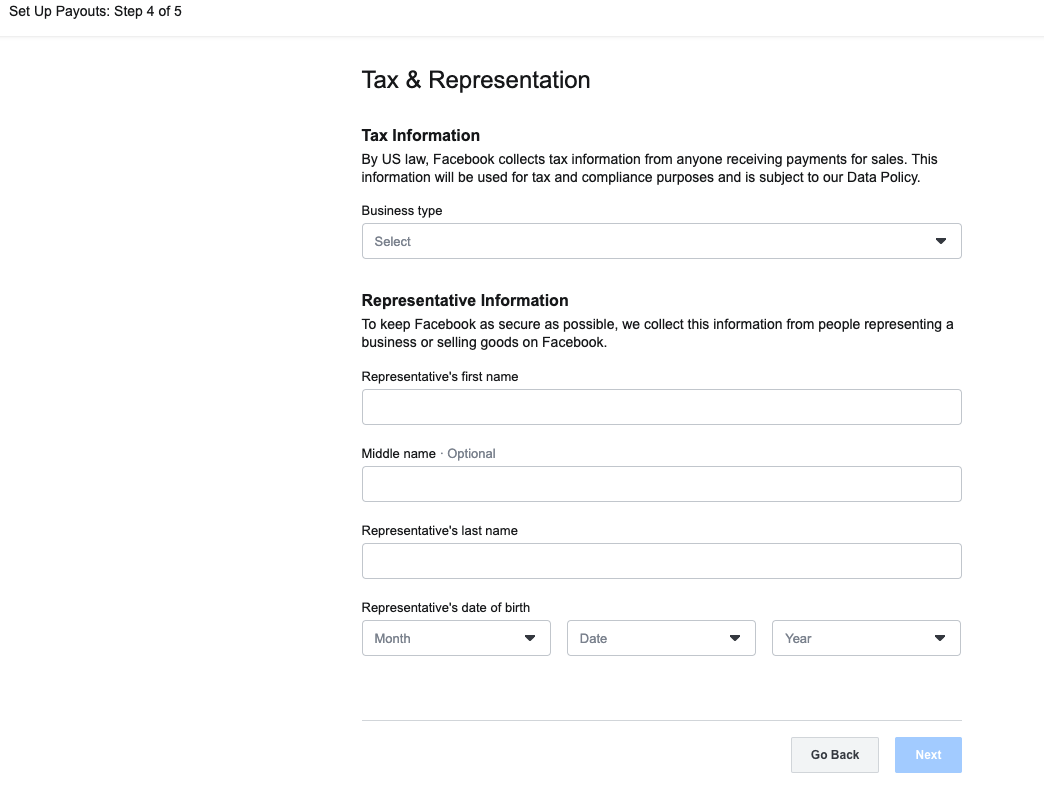
Step 4: Tax and Representation.
Add your tax information which will be used for tax and compliance purposes and representative information.
Step 5: Link you Bank.
Finally link your bank account where the payouts will be sent.
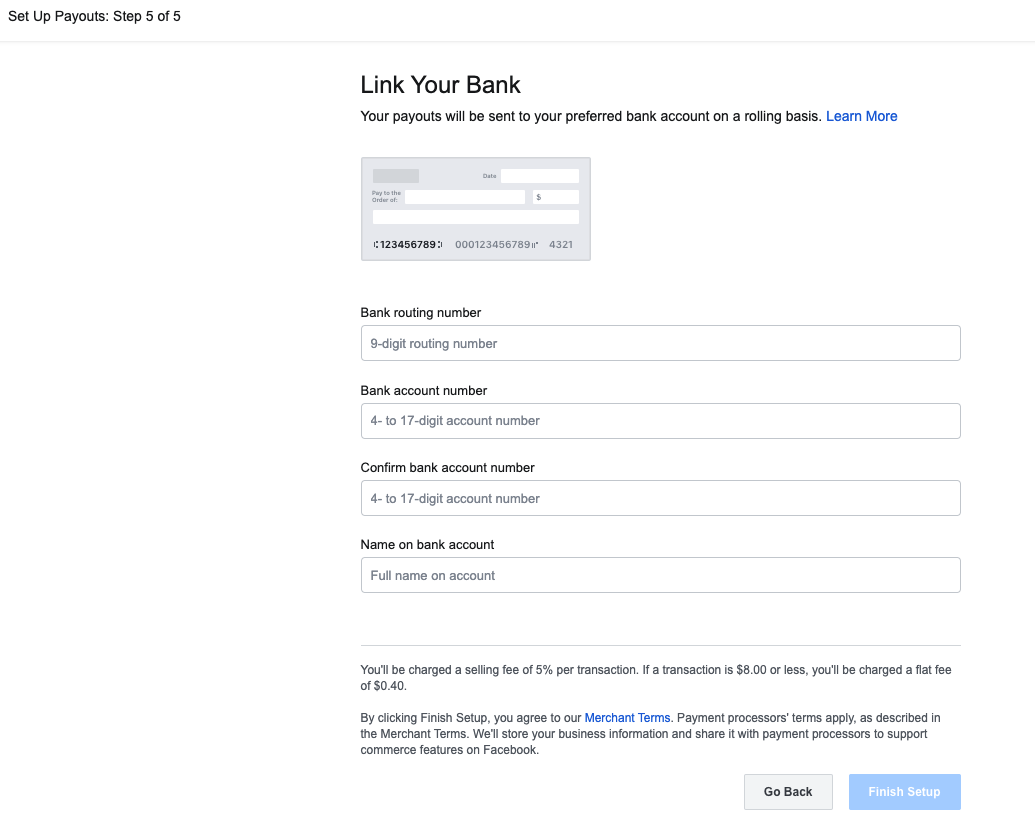
That’s it your store preferences have been set up.
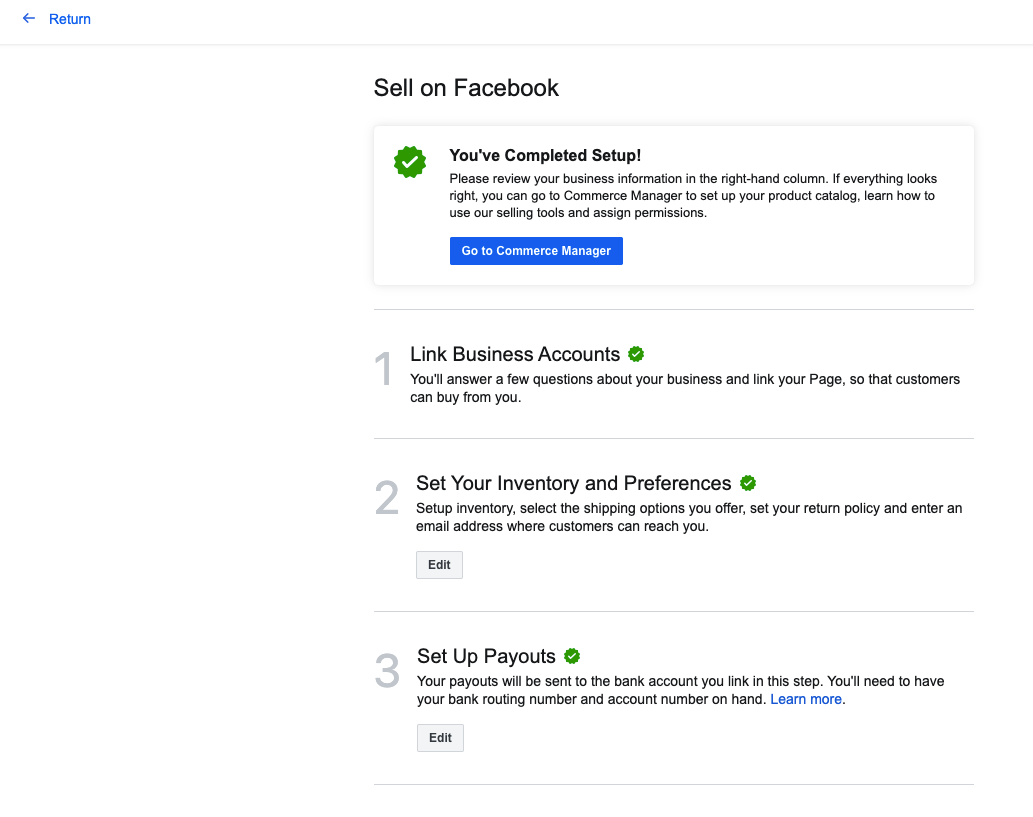
Now it’s time to add your product to your store catalog and start selling!.
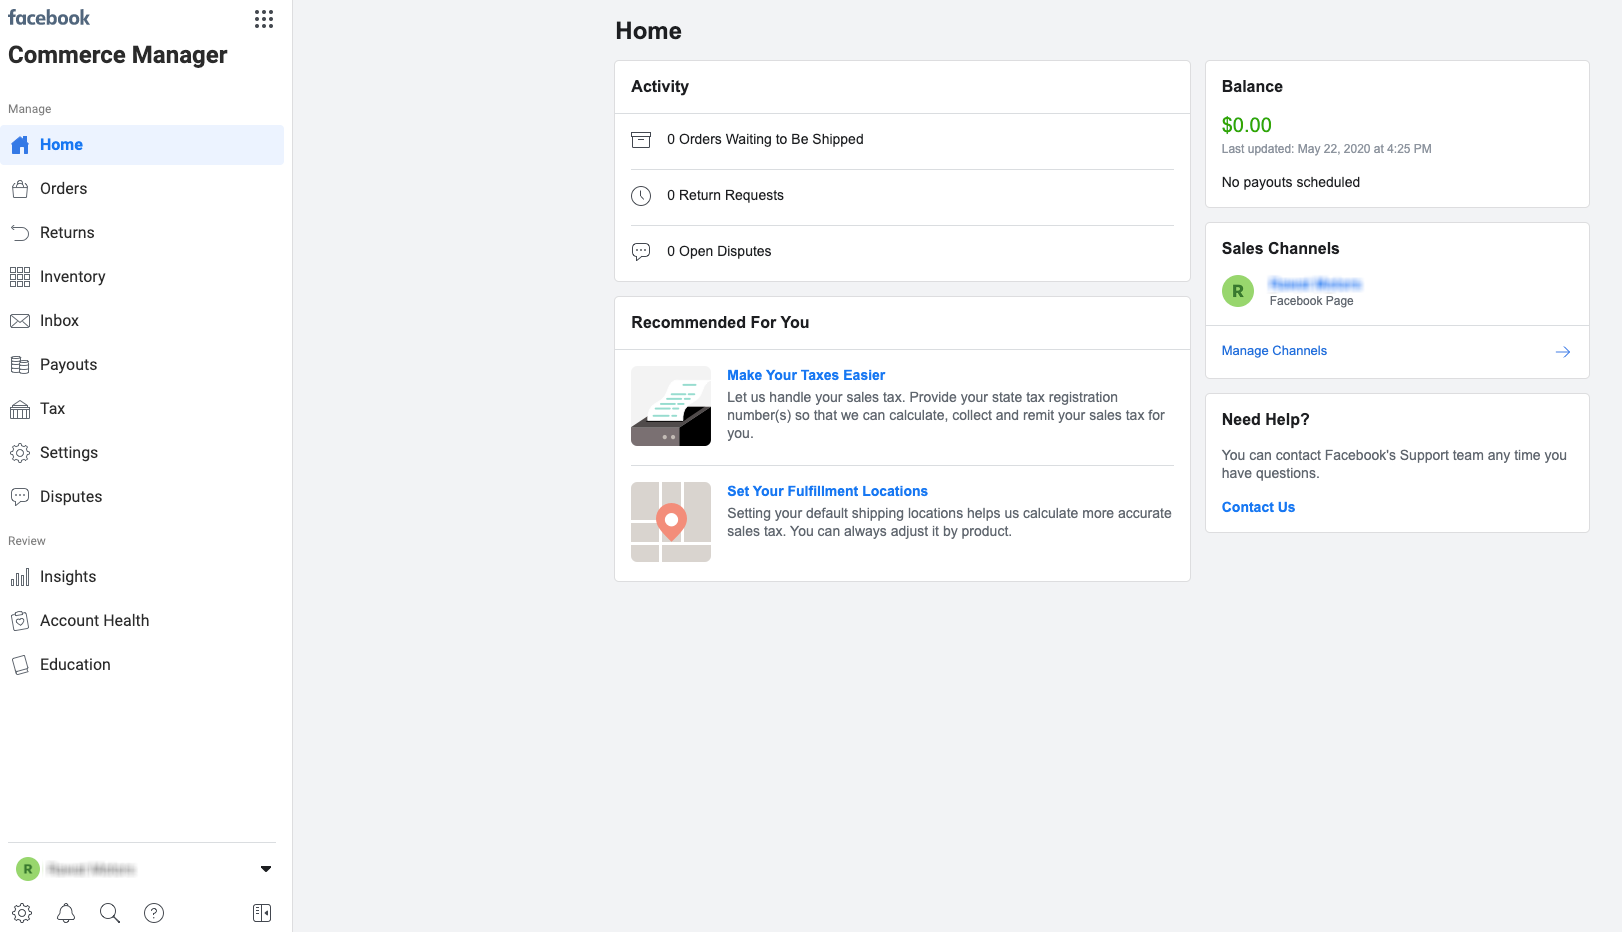
After setting up your store preferences you will have to Go to Commerce Manager, on the left-hand side of Commerce manager you will find below options
- Orders.
- Returns.
- Inventory.
- Inbox.
- Payouts.
- Tax and
- Disputes.
On the right-hand side of the page, you will find options to Set up Your Catalog, your Activity, and your Balance (payout activities).
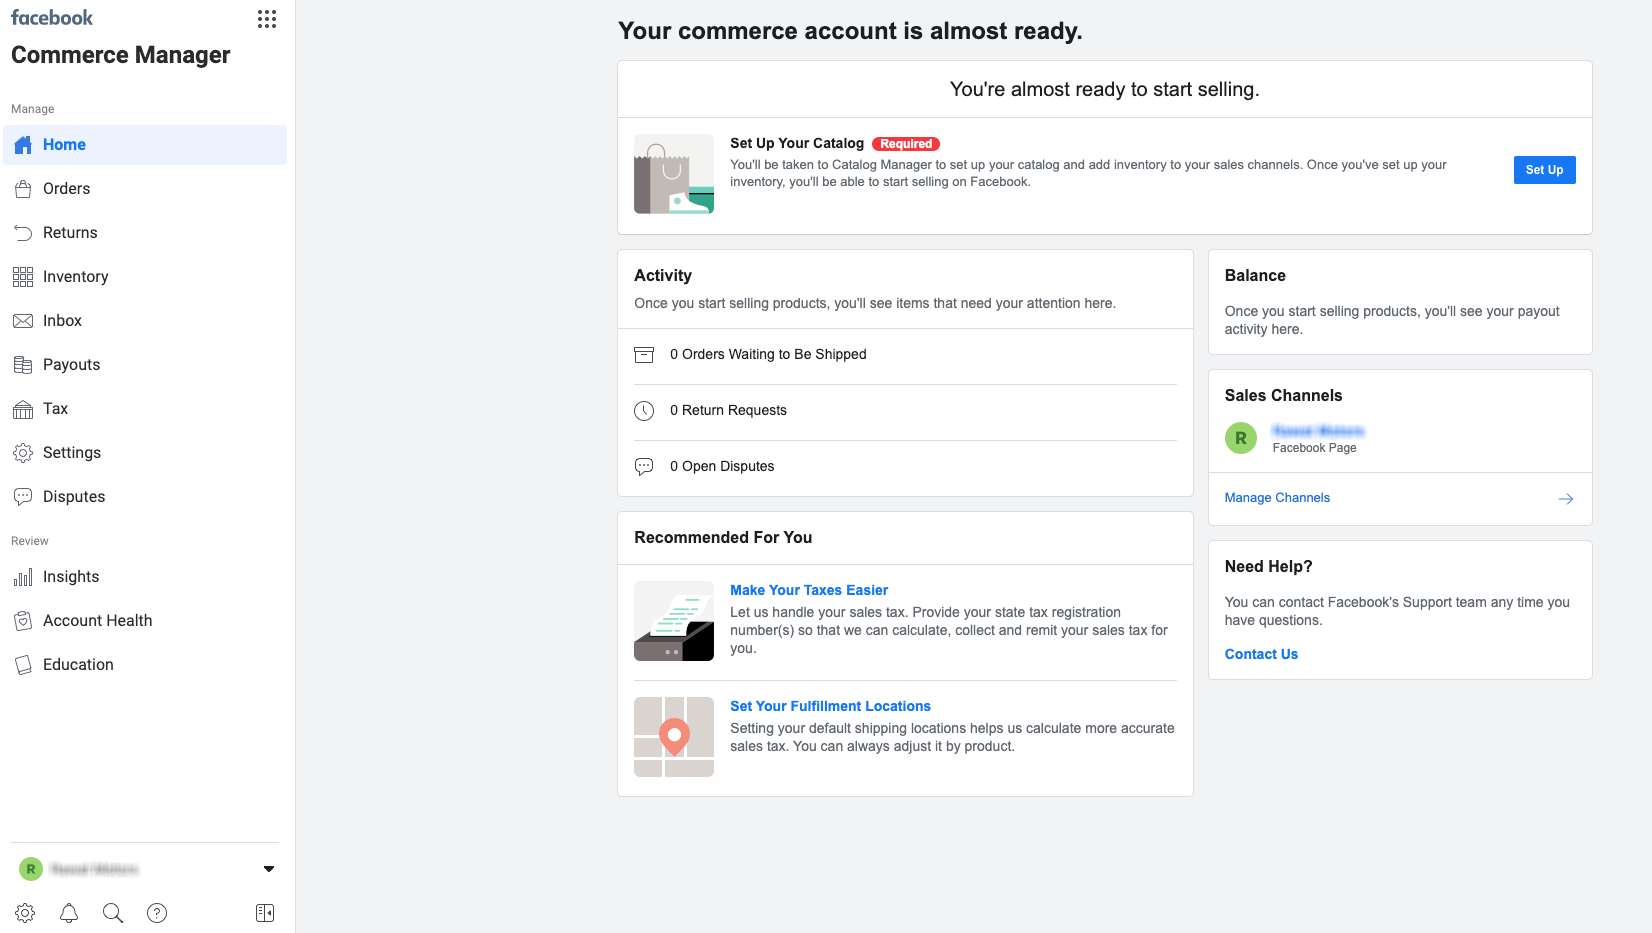
Set up Your Catalog: Click on the Setup button, you will be redirected to Catalog Manager and start adding your inventory to your sales channels. Once you’ve set up your inventory, you will be able to start selling your products on Facebook.
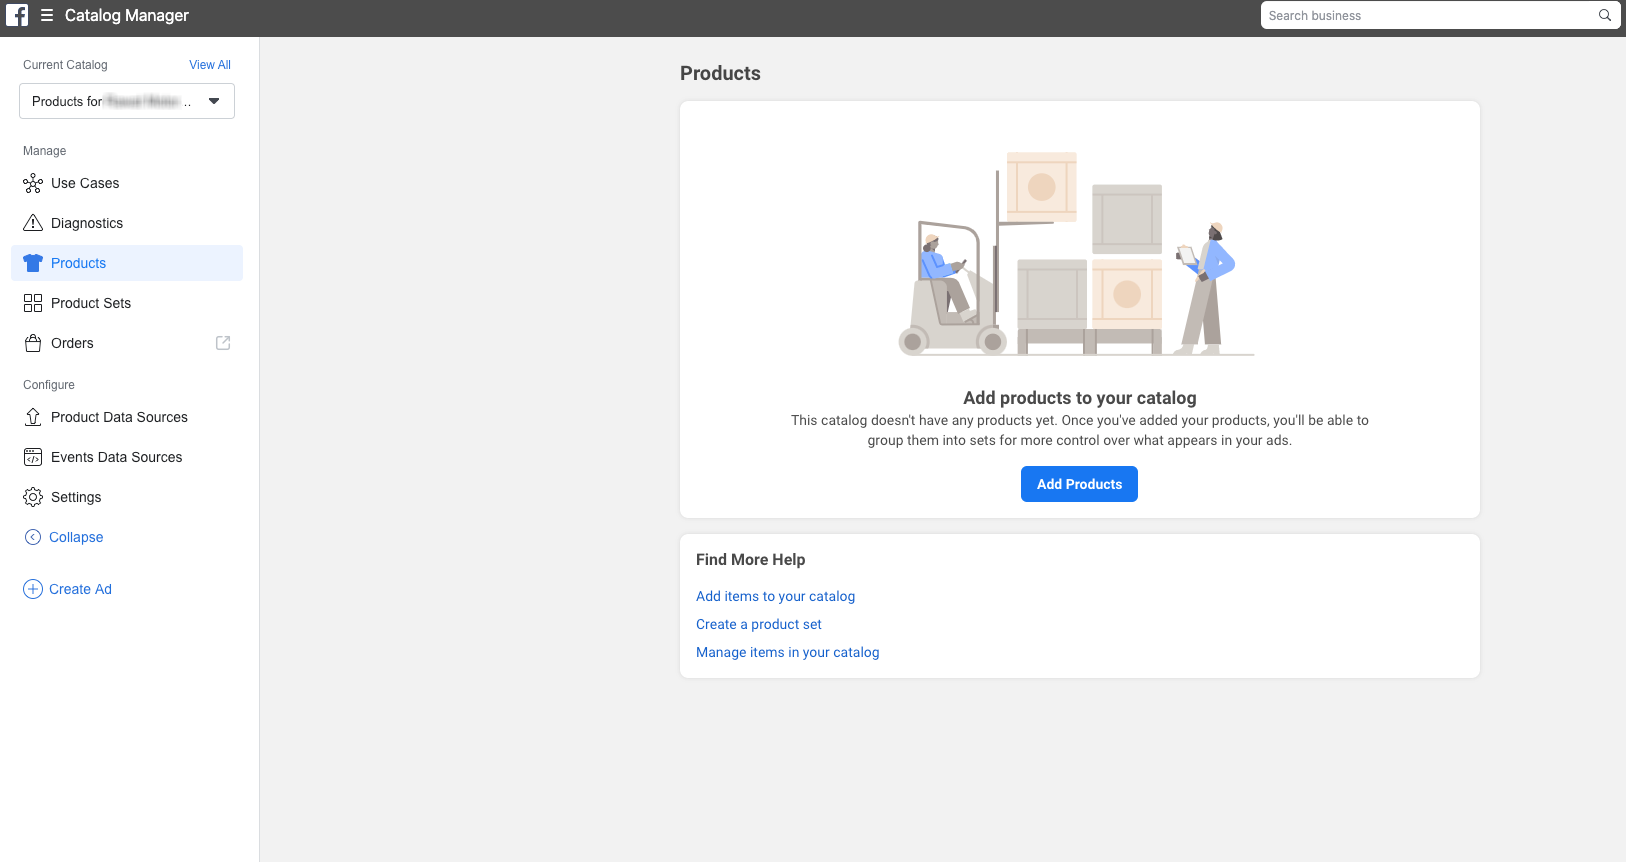
Adding Product: You can add a product to your catalog in three ways.
- Add Manually.
- Use Data Feeds.
- Connect Facebook Pixels.
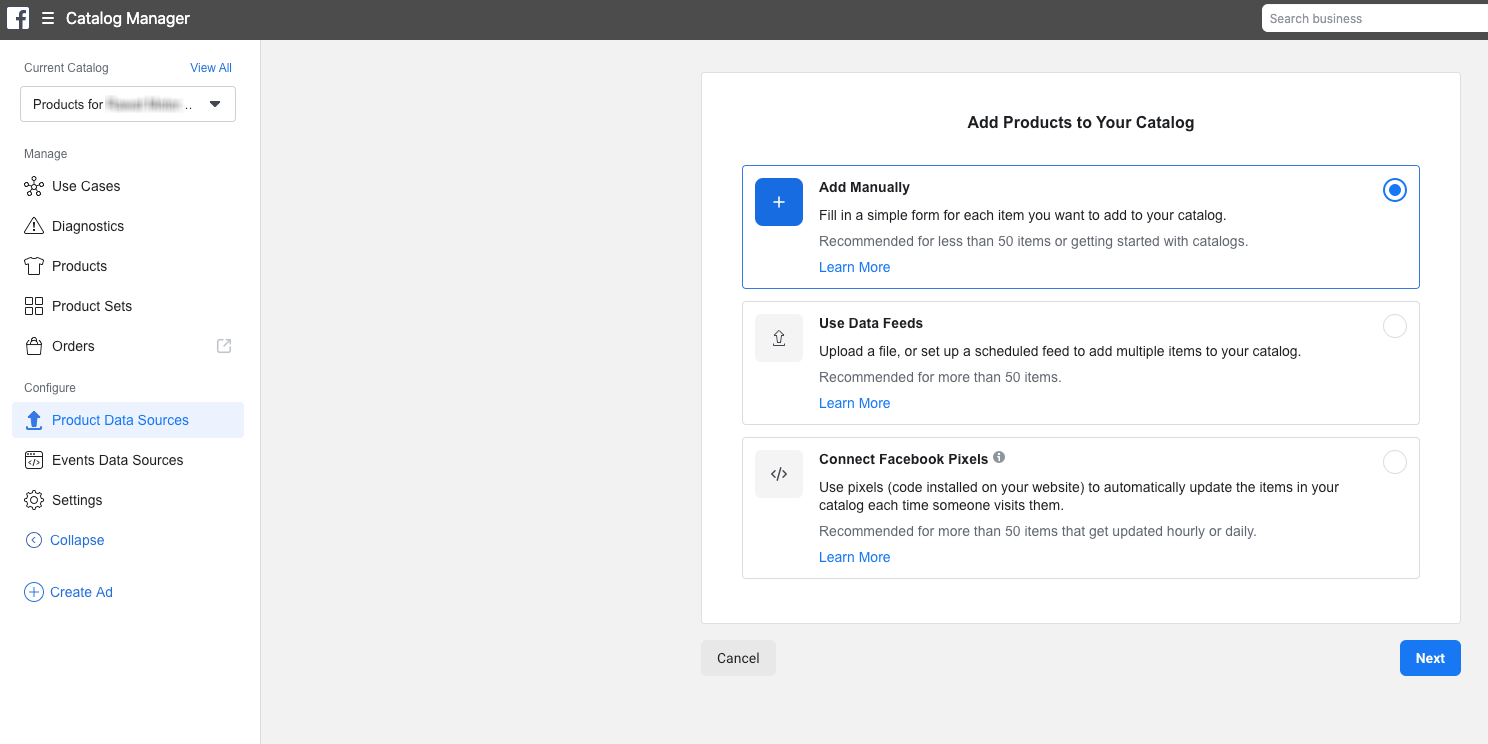
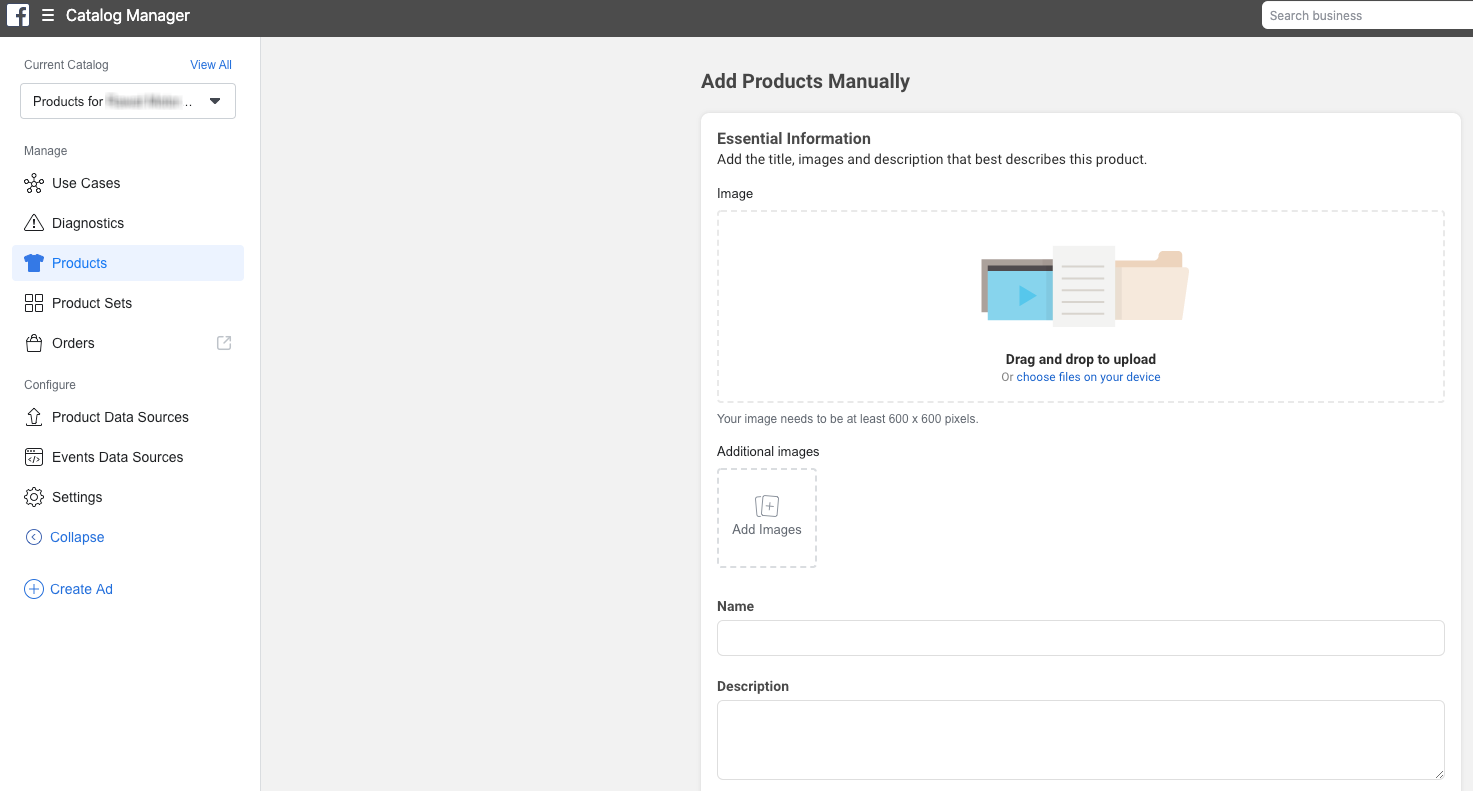
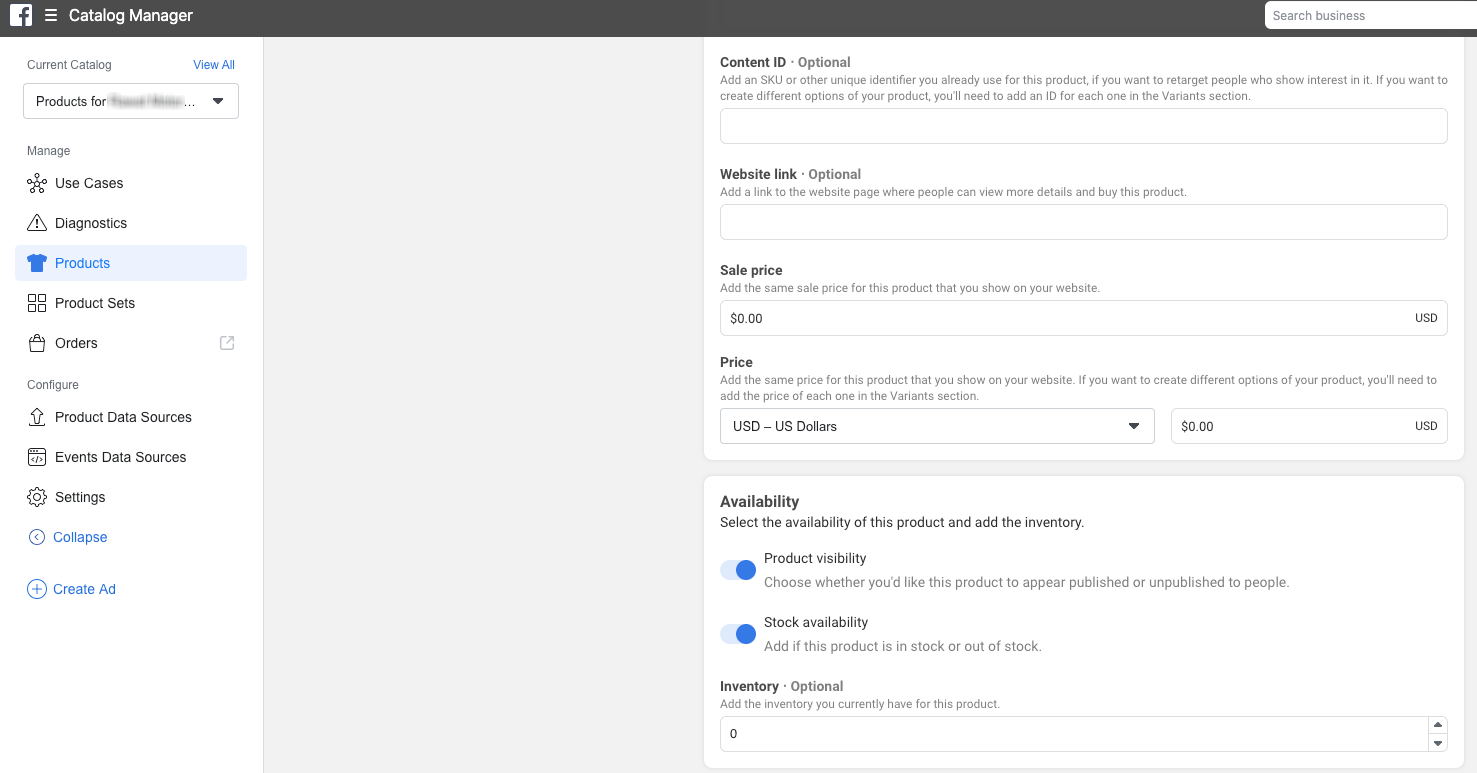
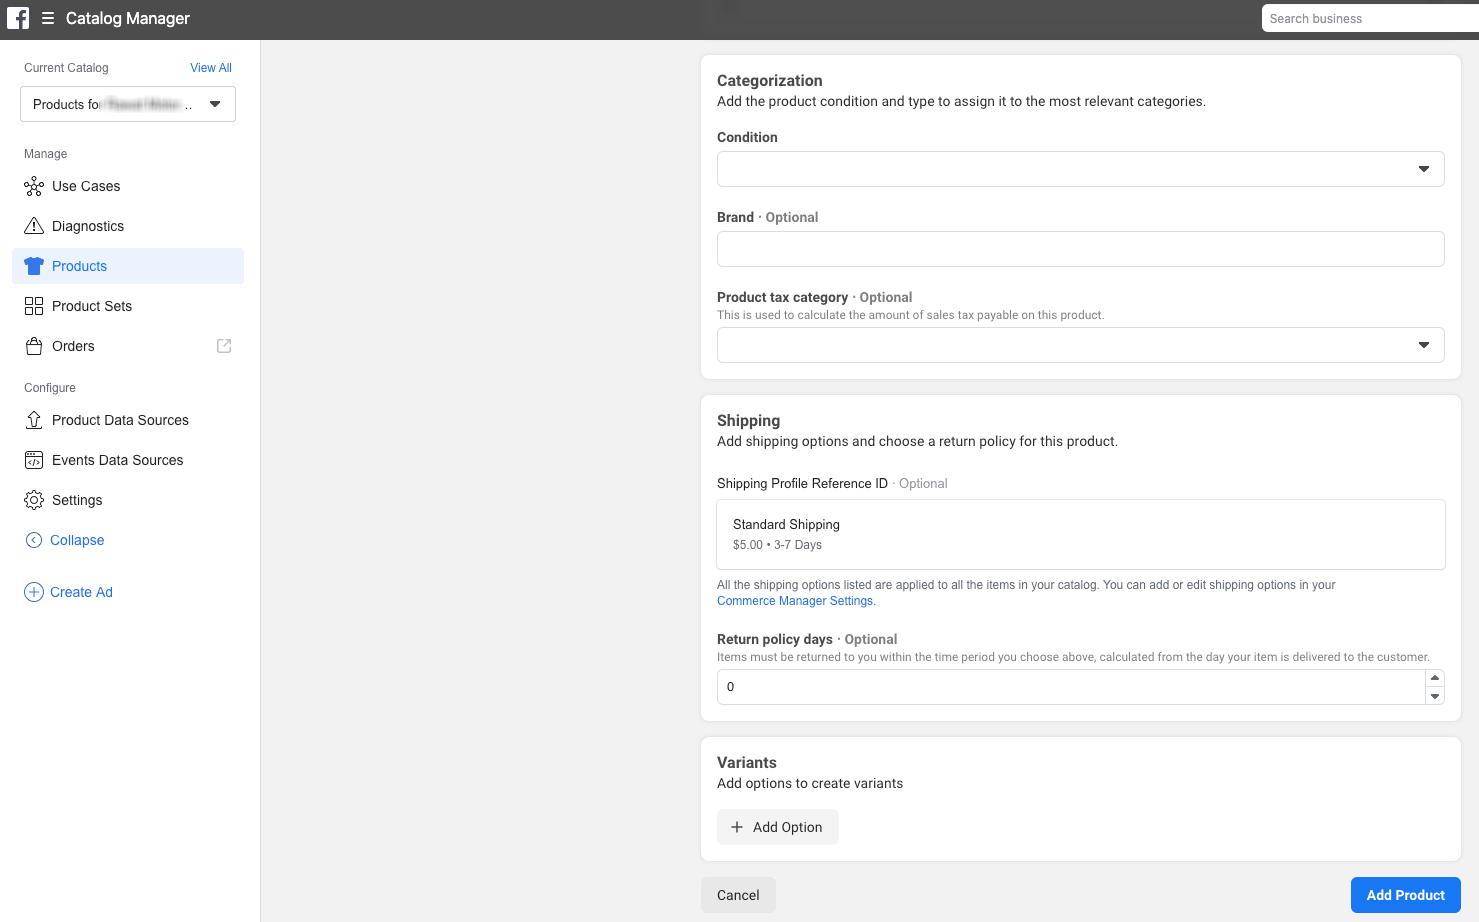
Adding Product Manually: You can add product manually to your catalog by adding the essential information like Image, Additional Image, Name, Description, Content ID (SKU or other Unique Identifier), Sale Price, Availability (Product Visibility and Stock Availability), Categorization, Shipping and, Variant if any.
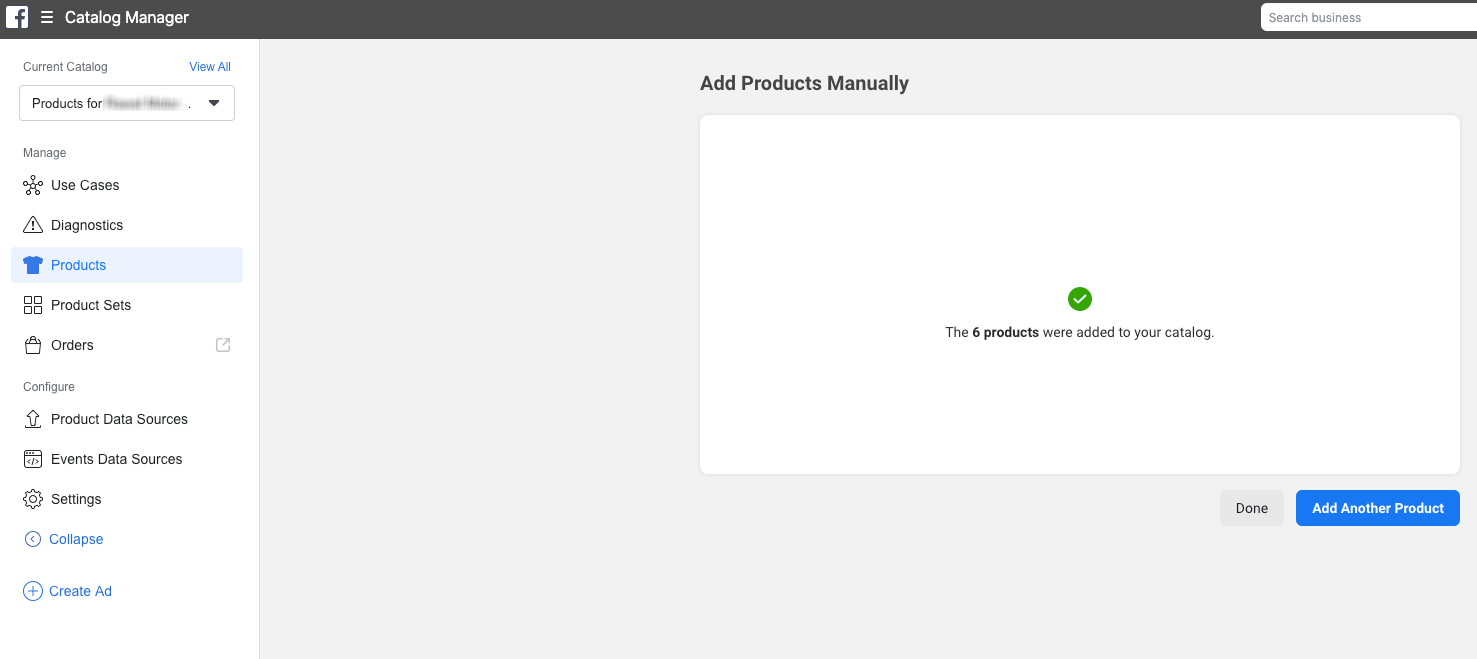
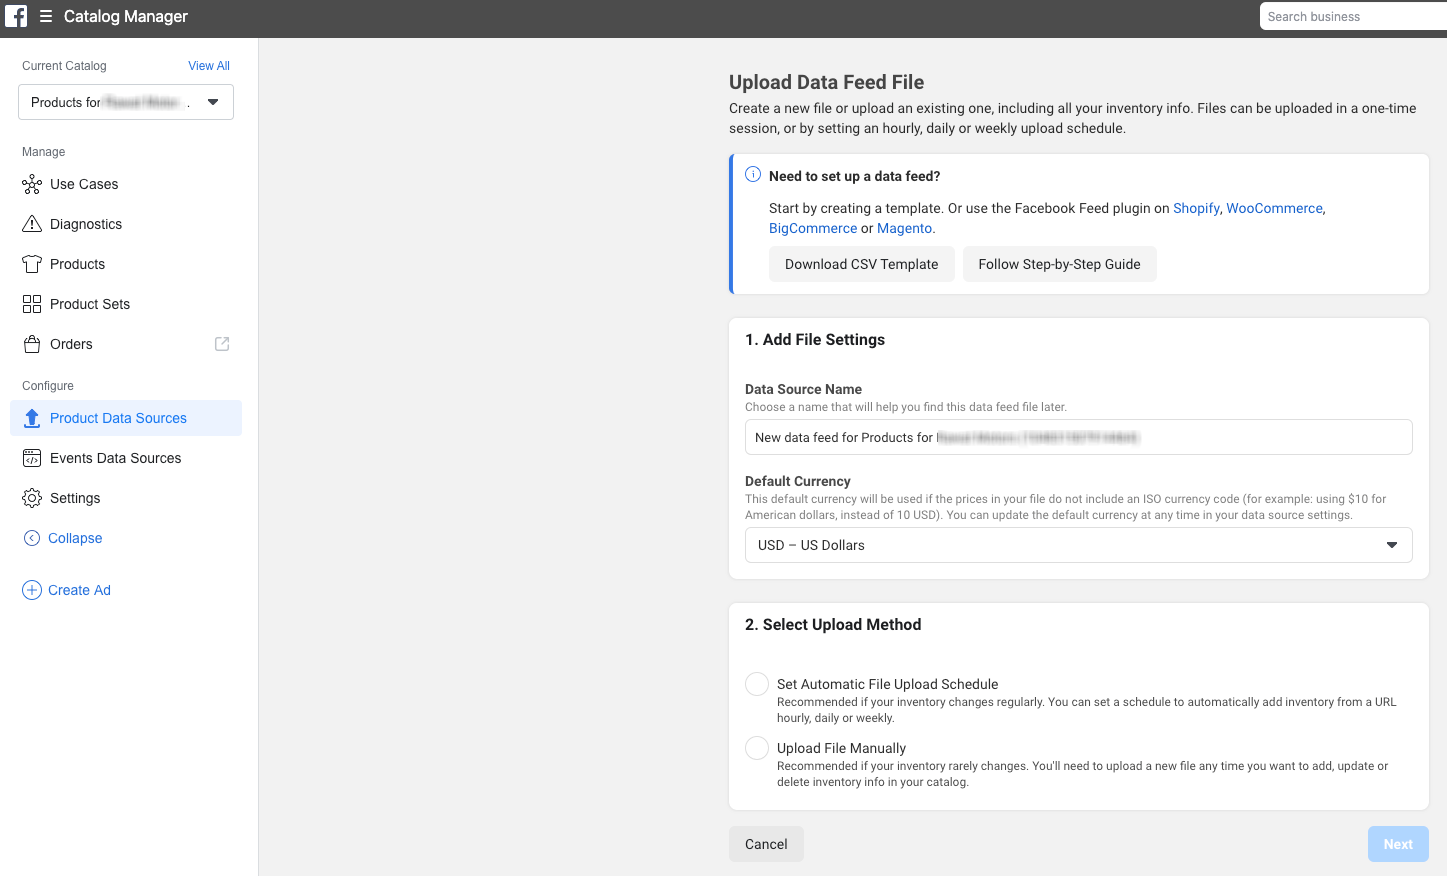
Using Data Feed: You can create a new file or upload the existing one, or you can use Facebook Feed Plugin for Shopify, WooCommerce, BigCommerce, or Magento. Give Data Source Name, select the Default Currency and, Select the Upload Method (Set Automatic File Upload Schedule or Upload file Manually).
That’s it Now you are ready to sell your products on Facebook and increase your Business sale.
Going digital doesn't have to be stressful, and when done well, it can come with many benefits for your business regardless of its size!
Not sure where to start setting up for your Facebook store or need help in setting up your e-commerce store and business. We help build a digital transformation strategy so that your business is functioning at the optimum digital level. For more looks at how you can refine your e-commerce ability, we here at Ziggle Tech can help. Contact us today for more info!
